


If you’re seeing missing or lifted shingles, granules piling up in the gutters, or bent flashing after a storm, that’s consistent with wind damage roof failure, not just aging materials. Photograph everything with timestamps before you touch anything, then get a professional inspection scheduled within a few days. Don’t start cleanup or repairs until you’ve documented the scene.
TL;DR:
- Wind damage usually causes concentrated roof failures at edges, corners, ridges, and slopes facing the storm, not uniform wear across the roof.
- Photographing entire slopes, corners, damage details, and attic conditions with timestamped images greatly supports insurance claims and speeds up approval.
- Secure emergency tarps with proper fasteners within 72 hours of storm damage to prevent further interior issues and document mitigation efforts thoroughly.
- Insurance payouts depend heavily on detailed, slope-specific documentation, timely filing, and the severity of actual damage versus age-related wear.
- Consulting a professional roofer for a free inspection is advised if active leaks or structural damage are visible, as immediate repairs may be necessary to prevent further harm.
Table of Contents
- What Are the Signs of Wind Damage on a Roof?
- How Does Wind Actually Damage a Roof?
- How Should You Safely Inspect and Document Roof Damage?
- What Should You Do in the First 24 to 72 Hours?
- How Do Wind Damage Insurance Claims Actually Work?
- When Should You Call a Roofer Instead of Handling It Yourself?
- Why Documentation Matters More Than Most Homeowners Think
- Get a Free Wind Damage Inspection From a Local Crew
- Sources
What Are the Signs of Wind Damage on a Roof?
Start on the ground. Walk the perimeter of your house and look up at each slope, especially the ones facing the direction the storm blew in from.
- Missing shingles or ones with lifted, curled tabs
- Creases running across shingle tabs (a sign wind flexed them without fully tearing them off)
- Excessive granules collecting in gutters or at downspout exits
- Bent, dented, or missing flashing around chimneys, vents, and skylights
- Displaced or cracked ridge caps along the roof’s peak
Then check the attic. Fresh ceiling stains, damp insulation, or a spot where daylight shows through the roof deck are all signs water has already found a way in, even if you can’t see exterior damage from the ground.
The location of the damage tells you something too. Wind damage tends to cluster at corners, edges, ridges, and whichever slope faced the storm directly, because that’s where pressure differences pull hardest on roofing materials, according to a forensic engineering review of wind-related roof damage. If the wear is spread evenly across the whole roof instead of concentrated at those points, you’re probably looking at age, not a specific storm event.
How Does Wind Actually Damage a Roof?
Wind doesn’t just push against your roof, it pulls. As air moves over the ridge and around corners, it creates a suction effect similar to the lift under an airplane wing, and that suction is strongest at edges, corners, and ridgelines where airflow separates and forms small vortices. The same forensic review notes this is why damage almost never spreads uniformly. It concentrates exactly where those pressure zones sit.
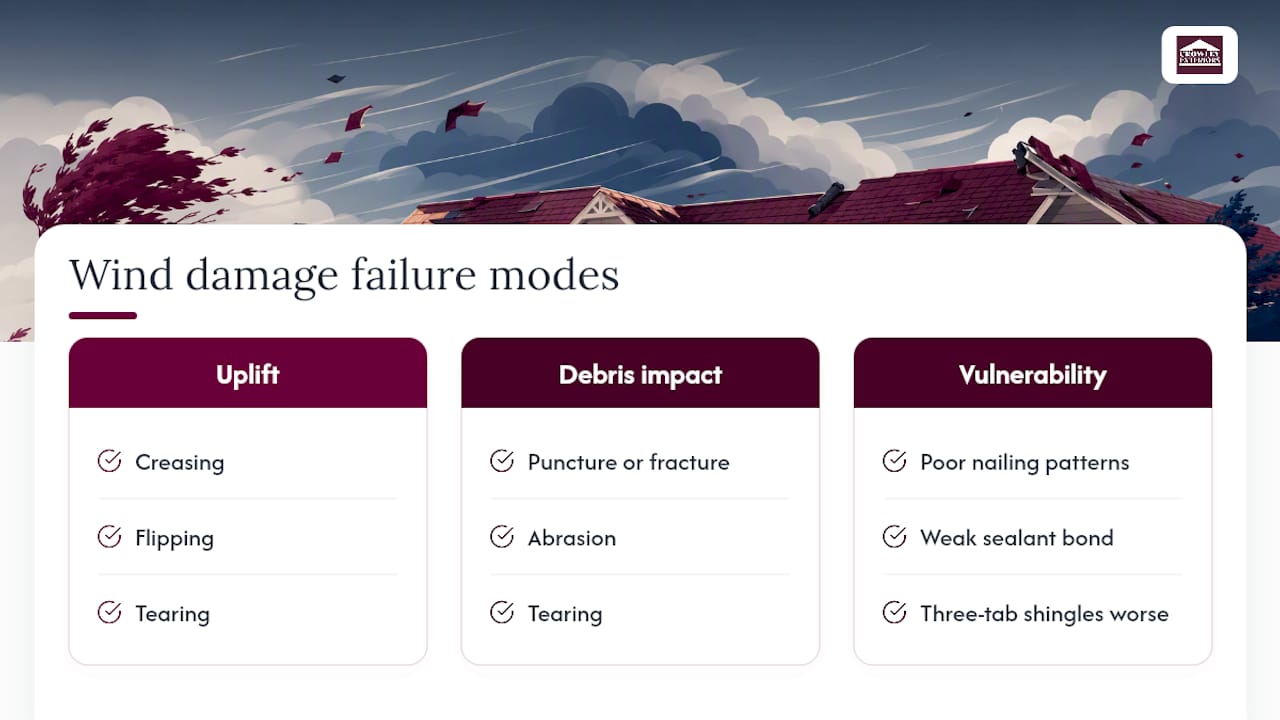
There are two distinct failure paths. Uplift failure happens when wind gets under a shingle edge and works it loose: creasing, flipping, or tearing it off entirely. Debris impact is different. A branch or hail-driven object punctures or fractures shingles regardless of wind uplift. An engineering analysis of asphalt shingle wind failures identifies four common failure modes: creasing, flipping, tearing, and abrasion. Poor nailing patterns or a weak sealant bond make all four more likely. Three-tab shingles generally hold up worse in high wind than laminated architectural shingles, largely because of how the starter course adheres.
How Should You Safely Inspect and Document Roof Damage?
Never climb onto a wet, steep, or storm-damaged roof to inspect it yourself. If you see sagging, exposed decking, or any hint of structural movement, stay off entirely and call a professional. For everything else, binoculars from the ground or a drone photo pass gets you what you need without the fall risk.
Once it’s safe to look, work through this sequence for each slope of the roof:
- Take one wide shot of the entire slope for context.
- Take four close-up shots, one from each corner of that slope.
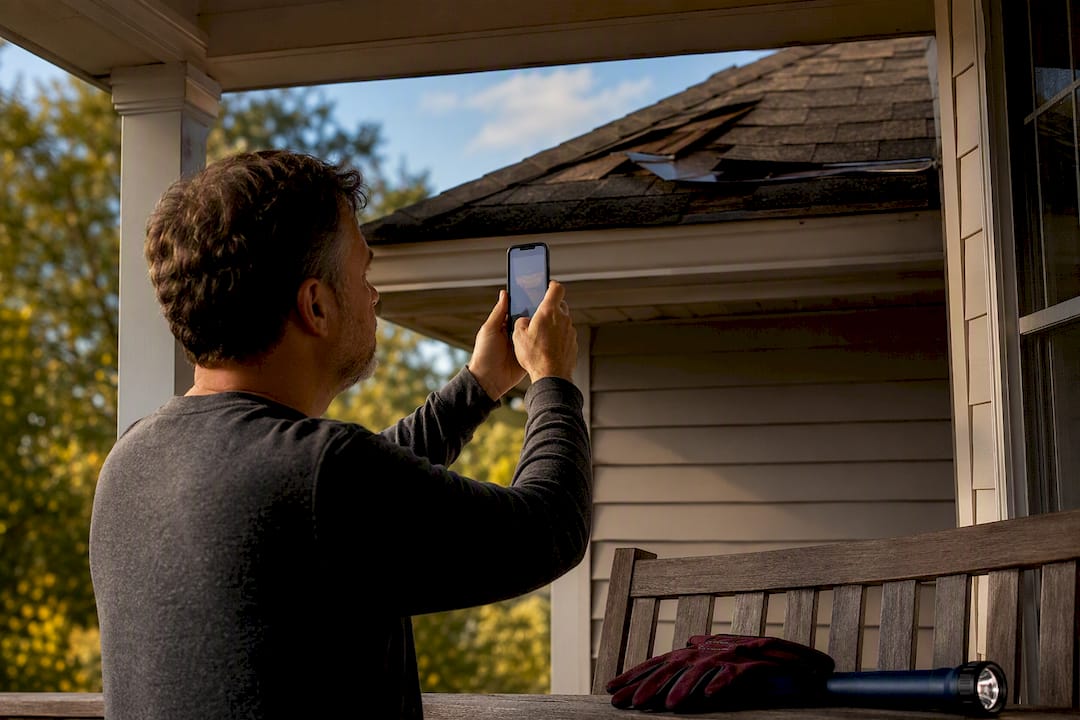
- Photograph any specific damage up close: lifted tabs, creases, missing shingles, exposed nails.
- Photograph the attic interior, capturing any daylight gaps, stains, or damp insulation.
- Note the date and time on every photo, and keep a printed or emailed copy of the local weather report from Ready or your local NWS station for that date.
That six-photo-per-slope habit (wide shot, four corners, detail shot) is the standard adjusters respond to best, according to a wind damage insurance claim filing guide. Drone imagery and slope-by-slope high-resolution photos give adjusters the visual context they need to approve a claim faster, largely because the images give them a consistent measurement reference instead of a handful of random snapshots.
Pro Tip: Save your pre-storm listing photos or old inspection reports if you have them. A “before” image next to your “after” photos is one of the fastest ways to prove the damage is new.
Organize the files into a labeled folder by slope and date, then convert them into a single PDF or zip file before sending anything to your insurer or contractor.
What Should You Do in the First 24 to 72 Hours?
Safety comes before property. If you see downed power lines, a sagging roofline, or any sign the structure is compromised, stay out of the house and call emergency services first.
Once the scene is safe, focus on stopping further damage:
- Cover exposed areas with heavy-mil poly tarps, secured with furring strips and screws rather than just nails or staples.
- Photograph the tarp once it’s installed, from both the ground and, if you can safely reach one, an upper window.
- Keep every receipt for tarps, fasteners, or emergency labor. Insurers often reimburse reasonable mitigation costs.
- Avoid signing an Assignment of Benefits form or a broad contingency contract with any contractor who shows up unannounced after a storm. Simple work orders for tarping are fine.
- File your claim as soon as possible after the storm, and write down the claim number the moment you receive it.
A properly secured emergency roof tarp buys you time to get a real inspection instead of rushing into repairs, and it keeps rainwater from turning a roof problem into a mold problem inside your attic and walls.
How Do Wind Damage Insurance Claims Actually Work?
Most homeowner policies fall under HO-3 or HO-5 forms, and both typically cover sudden wind damage while excluding gradual wear or neglect. Your deductible structure matters here. Many policies apply a separate, often percentage-based wind or hurricane deductible rather than your standard flat deductible, and whether your payout comes as replacement cost value or actual cash value can change your final check by thousands of dollars.
Adjusters lean heavily on documentation quality when deciding what to approve. Slope-by-slope photos with clear measurement references, paired with a contractor’s inspection that itemizes damage the way a professional estimate would (counts of affected shingles, underlayment condition, deck integrity), carries far more weight than a verbal description. A wind damage insurance claim filing guide points to documentation as the single highest-leverage action a homeowner controls in this process.
Here’s where claims tend to fall apart:
- Insufficient recorded wind speed data for your area on the date of loss
- Adjuster findings that attribute damage to wear-and-tear rather than a storm event
- Filing weeks or months after the storm, once memory and evidence have faded
- Cosmetic damage endorsements that limit payout for shingles that still function but look different
A pre-adjuster inspection from a claims-experienced roofer often catches damage a homeowner would miss, and gives you a second, professional opinion to compare against the insurer’s findings before you sign off on anything. If you want a fuller walkthrough of the filing process itself, our roof insurance claim guide covers it step by step.
When Should You Call a Roofer Instead of Handling It Yourself?
Call a professional immediately if you have an active leak, exposed roof decking, a large section of missing shingles, or anything that looks structural. Waiting even a few days on an active leak invites the kind of interior damage that costs far more than the roof repair itself.
Repair versus full replacement usually comes down to a few factors:
- How much of the roof’s total field area is affected
- The roof’s current age relative to its expected lifespan
- Whether leaks have already recurred in the same spot more than once
- Whether the damage points to an installation problem rather than the storm itself
A solid inspection and estimate should include photo documentation, an exact count of damaged shingles, an assessment of the underlayment and deck, and itemized line items in an Xactimate-style format that your insurer can review directly. Straightforward repairs often finish in a day or two once materials are on site; full replacements typically run several days depending on roof size and weather delays. Our roof replacement timeline guide walks through what to expect week by week if a full roof replacement turns out to be the right call.
Why Documentation Matters More Than Most Homeowners Think
Most people treat the aftermath of a windstorm as a cleanup problem first and a paperwork problem second. That’s backwards, and it costs homeowners real money every storm season. The photo you don’t take on day one is evidence you can’t recreate on day thirty, once the tarp’s up, the debris is cleared, and the roof looks nothing like it did the morning after the storm.
What gets underestimated is how much the quality of documentation, not just its existence, shapes a claim outcome. A blurry phone photo of “some missing shingles” and a slope-by-slope set with corner close-ups and attic shots tell an adjuster two very different stories, even when the underlying damage is identical. Many experienced roofing contractors working through Missouri’s wind and hail seasons observe that homeowners who document methodically and bring in a contractor early get faster, cleaner claim resolutions than those who wait to see how bad things “really” look. A free inspection paired with photo-based documentation isn’t a sales tactic. It’s the difference between a claim that sails through and one that gets picked apart line by line.
— Mario
Get a Free Wind Damage Inspection From a Local Crew
If you’d rather have someone experienced inspecting storm-hit roofs take a look, consider contacting a local roofing company that offers free inspections and no-obligation estimates, so you can get a clear answer on what’s damaged and what it’ll cost before you commit to anything.

Professional roofing teams often handle emergency tarping, insurance claim documentation, and repair or replacement work, sometimes offering guarantees on their roofing work. If you’re staring at lifted shingles or a fresh ceiling stain right now, request a free roof inspection and we’ll get someone out to document the damage properly, the same way an adjuster will want to see it. Between visits, keep gutters and downspouts clear (a service like Island Moss Busters handles that if you’re not local to us) so trapped debris doesn’t mask new wind damage the next time a storm rolls through.
Sources
- Wind damage roof insurance claim: 2026 filing guide
- Discerning Wind-Related Damage to Residential Roofs | Journal of the National Academy of Forensic Engineers
- Wind effects on asphalt shingles (Haag / engineering review)
- A brief guide to mold, moisture, and your home — EPA
- Roof 101 — Insurance Institute for Business & Home Safety (IBHS)