

You can file a roof insurance claim whenever damage stems from a covered peril — wind, hail, a fallen tree, or similar events — but filing only makes sense when the repair cost meaningfully exceeds your deductible and the payout justifies the potential premium impact. If there’s interior water damage or a structural safety issue, file immediately regardless of cost.
Your first 24–72 hours checklist:
- Document now. Photograph and video every damaged area with timestamps on. Don’t wait for clear skies if it’s safe to shoot from the ground.
- Mitigate further damage. Tarp exposed areas, cover broken skylights, and save every receipt. Carriers expect you to prevent additional loss.
- Get a written contractor inspection if you can schedule one within the first week. It’s not required before you call your carrier, but it strengthens your file.
- Notify your carrier and record the claim number. Write down the representative’s name, the time of the call, and every commitment made.
- Schedule the adjuster meeting and invite your contractor. Having a licensed roofer on-site during that inspection materially changes outcomes.
Before you call, pull your declarations page and note two things: your policy type (RCV or ACV) and your deductible amount. Those two numbers determine what your first check looks like.
Key Takeaways
Filing a roof insurance claim successfully comes down to three things: thorough documentation from day one, knowing your policy type before you call, and having a licensed contractor in the room when the adjuster shows up.
| Point | Details |
|---|---|
| Document within 72 hours | Capture 60–100+ timestamped photos using objective, directional labels — not cause-based ones. |
| Know ACV vs. RCV before you call | RCV pays depreciation after proof of repair; ACV pays the depreciated value upfront with no holdback. |
| File promptly | Most policies require prompt notice; filing sooner reduces disputes about damage cause. |
| Bring a contractor to the adjuster meeting | A licensed roofer on-site identifies specific damage and reduces the risk of a short scope. |
| Crowleyexteriors | Offers free inspections, written scopes, and adjuster meeting support for St. Charles County homeowners. |
Table of Contents
- Should you file a roof insurance claim or pay out of pocket?
- How to file a roof insurance claim: step-by-step workflow
- How to document roof damage so your claim holds up
- What your policy type means for your payout
- How to handle disputed scope, underpayment, and denials
- When should you call a roofer, a public adjuster, or an attorney?
- What are the typical timelines for a roof insurance claim?
- What to say (and not say) to your insurance adjuster
- What successful claims actually look like in the field
- Crowleyexteriors: free inspections and claim support in St. Charles County
- Authoritative resources for homeowners
- Sources
Should you file a roof insurance claim or pay out of pocket?
The math is straightforward. If a contractor estimates $4,000 in repairs and your deductible is $3,500, filing nets you roughly $500 before depreciation — and that’s before any premium increase. For a small cosmetic repair, paying out of pocket often costs less over three years than the rate bump that follows a claim.
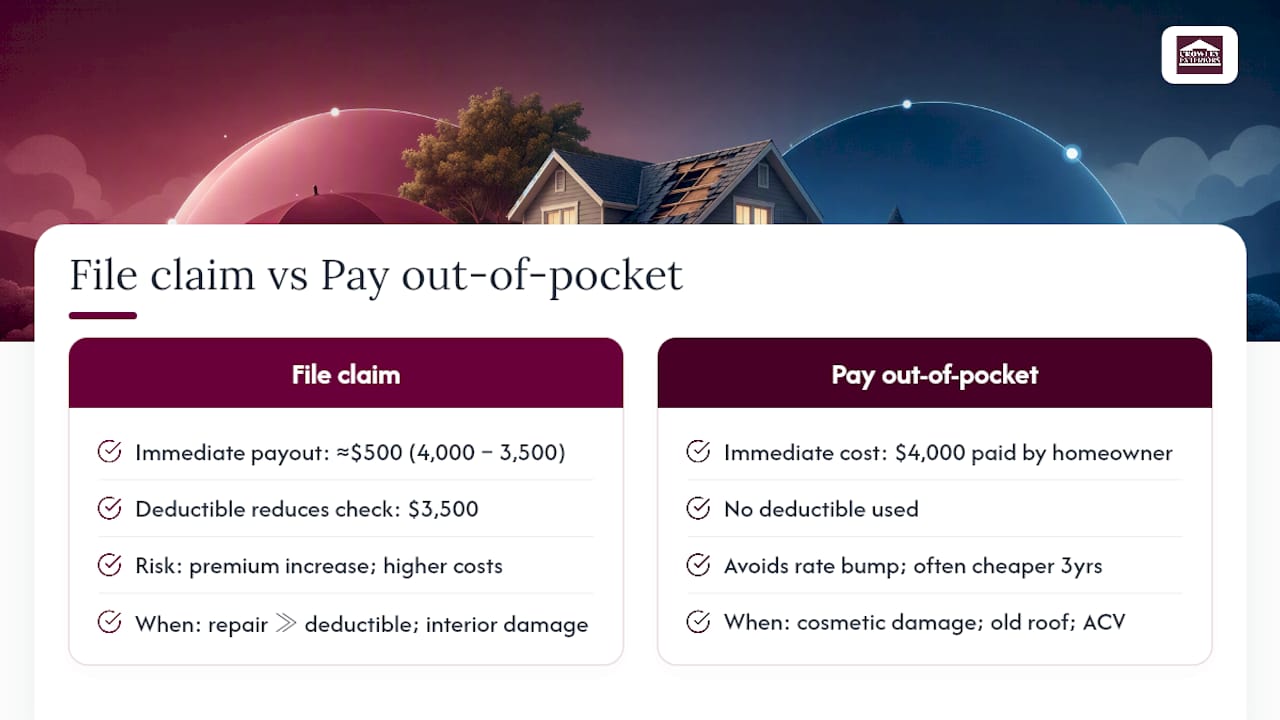
File when the numbers clearly favor it: large repair costs well above your deductible, documented covered perils (wind, hail, fallen tree), or any interior water damage. A roof with active leaks or a compromised structure is never a “wait and see” situation. Filing earlier also reduces dispute risk because the cause of damage is easier to establish close to the event.
Push toward handling it yourself when damage is cosmetic, your roof is old and covered under ACV (meaning heavy depreciation will shrink the check), or you’ve filed multiple recent claims that already elevated your premium. One more claim in a short window can trigger non-renewal in some states.
Not all damage is storm-related, either. Biological growth, animal intrusion, or rodent damage often falls under maintenance exclusions — a professional inspection can tell you which category you’re dealing with before you open a claim you can’t win.
How to file a roof insurance claim: step-by-step workflow
The full roof damage claim process runs through eight stages from discovery to final payment. Here’s the sequence with realistic timing at each step.
- Discover and assess (Day 0–1). Walk the perimeter safely. Note the date of the storm or event.
- Document thoroughly (within 72 hours). Full photo and video set — more on this in the next section.
- Mitigate further damage (within 48 hours). Tarps, temporary patches, board-ups. Keep all receipts.
- Get a contractor inspection (within 1 week). A written scope from a licensed roofer before or alongside your claim strengthens your position.
- Notify your carrier and open the claim (within 30 days, sooner is better). Have your policy number, date of loss, photos, and contractor notes ready. Record the claim number and rep name.
- Adjuster inspection (typically 5–21 days after filing). Be present. Have your contractor there if possible.
- Review the estimate. Compare it line by line against your contractor’s scope. Flag discrepancies in writing.
- Complete repairs and submit final invoices. Under RCV policies, this triggers the release of withheld depreciation.
How to document roof damage so your claim holds up
A complete documentation set for a hail or wind claim typically runs 60–100+ images: four establishing shots of the full structure, 6–12 photos per roof slope, 8–12 shots of soft metals (gutters, vents, flashing, AC fins), 4–6 ground-level photos of debris or granule accumulation, and 4–8 interior shots of any water intrusion.
Label files objectively. “Front_Slope_Missing_Shingle_Upper” is a strong label. “Front_Slope_Hail_Damage” is not — it draws a conclusion you’re not qualified to certify, and it gives a carrier grounds to push back. Use directional and component-based labels that describe what you see, not what caused it.
Four written records every claim file should include:
- Storm timeline log. Date, time, and nature of the weather event. Pull official confirmation from the NOAA Storm Events Database and attach it.
- Damage description sheet. One sentence per damage point, written as observations (“Three shingles missing on the north slope, upper third”).
- Communications log. Every call and email: date, time, representative name, claim number, and what was promised.
- NWS/NOAA storm event confirmation. Carriers accept this as independent third-party evidence of the event.
Pro Tip: When you call your carrier to open the claim, use this phrasing: “I’m calling to report damage to my roof that I believe occurred during the storm on [date]. I’d like to open a claim and get an adjuster scheduled.” Write down the claim number before you hang up.
What your policy type means for your payout
Replacement Cost Value (RCV) and Actual Cash Value (ACV) are the two coverage types that most affect what you actually receive. RCV pays to replace damaged materials with like kind and quality. ACV pays the depreciated value — age and wear reduce the check significantly.
Here’s how the math plays out on a $15,000 roof replacement:
- ACV policy: Carrier depreciates the roof by 40% for age. You receive $9,000 minus your $2,000 deductible — a check for $7,000. You cover the remaining $8,000 yourself.
- RCV policy: Carrier issues an ACV payment first ($7,000 in this example). After you complete repairs and submit the final invoice, they release the recoverable depreciation holdback — another $6,000. Your out-of-pocket is only the $2,000 deductible.
Missing the timing window to submit that final invoice can forfeit the recoverable depreciation entirely. Check your policy for the deadline — it’s often 12–24 months from the date of loss, but it varies.
Key policy details to check on your declarations page:
- Deductible type: flat dollar amount vs. percentage (hurricane or wind/hail deductibles are often 1–5% of dwelling coverage, not a flat number)
- Roof age schedule: some carriers switch older roofs to ACV regardless of your base policy
- Exclusions: wear and tear, lack of maintenance, and biological damage are the most common reasons claims get denied
A Fortified Home certification can sometimes improve your coverage terms or qualify you for premium discounts — worth asking your carrier about if you’re replacing the roof anyway.
How to handle disputed scope, underpayment, and denials
Scope disputes happen when the adjuster’s measurement differs from your contractor’s. The adjuster might miss a slope, undercount damaged squares, or exclude line items your contractor flagged. The fix is a line-item comparison — put both estimates side by side and submit a written supplement with photos backing each contested item.
If the supplement doesn’t resolve it, request a formal re-inspection. Most policies include an appraisal clause: both sides hire an independent appraiser, and a neutral umpire settles the difference. It costs money but moves faster than litigation.
Escalation options, in order of effort:
- Re-inspection request — low cost, often resolves measurement errors
- Supplement submission — contractor’s line-item scope with photo support
- Public adjuster — advocates for you on scope and valuation; typically charges 10–15% of the claim settlement
- State Department of Insurance complaint — file at your state DOI if the carrier acts in bad faith or violates state response timelines
- Attorney — appropriate for outright denials or bad-faith patterns; many work on contingency for insurance disputes
Keep your communications log current through every stage. Disputed scope is often resolved by referencing prior commitments the adjuster made — commitments that only exist if you wrote them down.
When should you call a roofer, a public adjuster, or an attorney?
Each professional plays a different role, and bringing in the wrong one at the wrong time wastes money.
Roofing contractor: Call one first, before or alongside your carrier notice. A licensed roofer provides the written scope, attends the adjuster meeting, and later supplies the final invoice that releases your recoverable depreciation. For choosing a roofing contractor, verify their license, insurance, and local track record before signing anything.
Public adjuster: Consider one for large or complex claims (typically above $20,000–$25,000), multi-peril events, or when the carrier’s estimate is significantly below your contractor’s. They can’t guarantee a higher payout, but they know how to build a scope the carrier has to answer.
Attorney: Bring one in when the carrier denies a valid claim outright, delays unreasonably, or acts in bad faith. Most insurance attorneys offer free consultations and work on contingency for bad-faith cases.
Crowleyexteriors offers free roof inspections and written contractor reports — the kind of documentation that makes the adjuster meeting go faster and the scope harder to dispute.
What are the typical timelines for a roof insurance claim?
Filing deadlines vary by state and policy language. Some policies require “prompt notice” within days; state statutes of limitation can run from one to several years depending on jurisdiction. Filing sooner always reduces ambiguity about the cause of damage — the longer you wait, the easier it is for a carrier to argue pre-existing wear.
| Stage | Realistic range |
|---|---|
| Carrier acknowledgement | 1–3 business days |
| Adjuster visit | 3–21 days after filing |
| Estimate issuance | 1–2 weeks post-inspection |
| ACV payment | 1–2 weeks after estimate approval |
| Repairs completed | Varies by contractor availability |
| Recoverable depreciation release | 14–90 days after final invoice |
| Total process (uncomplicated) | several weeks to a few months |
Follow up every 7–10 days if you haven’t heard back. A short email — “I’m following up on claim #[number] filed on [date]; please confirm the next step and expected timeline” — creates a paper trail and keeps your file moving.
What to say (and not say) to your insurance adjuster
The adjuster’s visit is a forensic inspection. What you say shapes the record.
Do:
- Describe what you observed: “I noticed three shingles missing on the north slope after the storm on [date].”
- Ask the adjuster to walk every slope and document their findings in writing.
- Confirm their scope and any commitments in a follow-up email the same day.
Don’t:
- Diagnose the cause: avoid “that’s hail damage” or “the wind did that” unless you’re a qualified inspector.
- Sign a release or accept a settlement before you’ve reviewed the full scope with your contractor.
- Minimize damage to seem cooperative — state every observation you have.
Sample initial call script: “Hi, I’m calling to report storm damage to my roof at [address]. The event occurred on [date]. I’d like to open a claim, get a claim number, and schedule an adjuster. Can you also confirm what documentation I should submit through your portal?”
At the inspection: “I’d like to walk each slope with you. My contractor has identified [specific items] — I have photos and a written scope I can share with you today.”
Follow-up email same day: “Per our inspection today, you noted [X, Y, Z]. Please confirm these items are included in your scope. I’ll submit my contractor’s estimate for any items not covered in your initial assessment.”
Documents to hand the adjuster at the visit: your timestamped photo set, the contractor’s written inspection, and the NOAA storm event confirmation.
What successful claims actually look like in the field
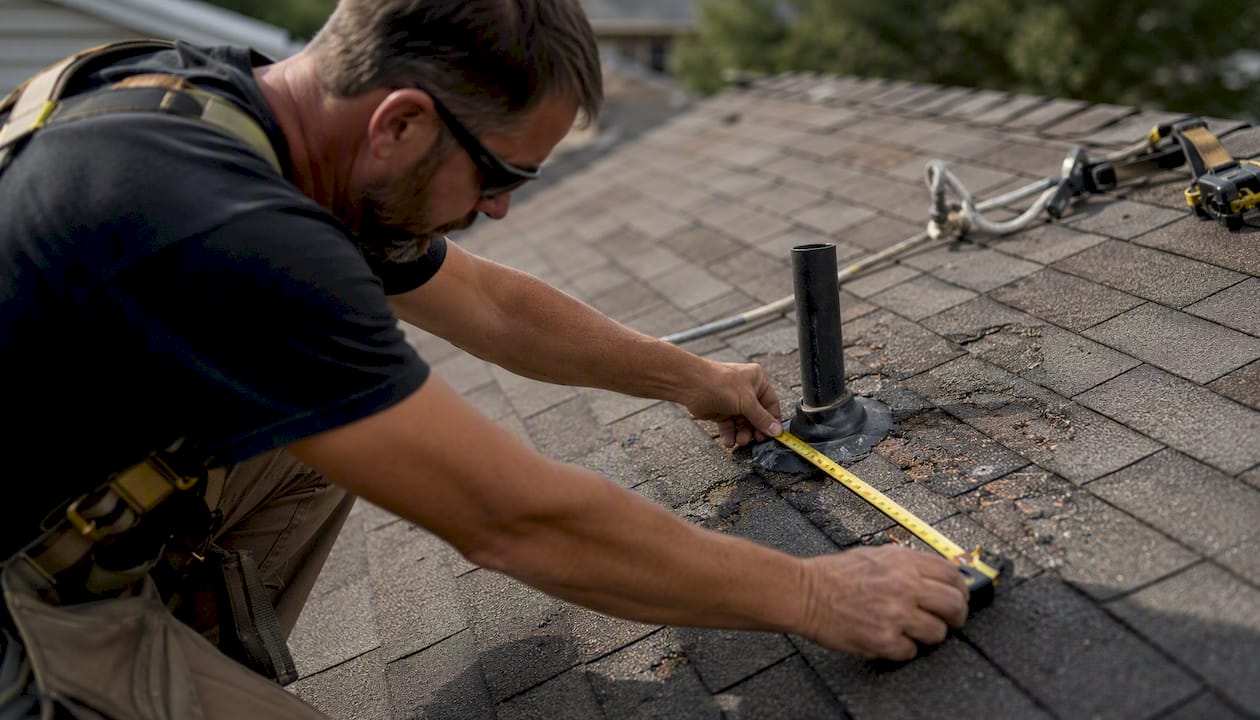
The adjuster meeting is the moment most homeowners underestimate. It’s not a conversation — it’s a forensic inspection with a professional who does this every day. Having a licensed roofer present to point out specific damage types, measurement items, and line items the adjuster might otherwise skip is the single biggest difference between a full scope and a short one.
The most common mistakes seen in the field: incomplete photo sets that skip interior shots, labels that draw conclusions instead of describing observations, and missing storm documentation. A homeowner who shows up with 40 unlabeled photos and no NWS confirmation is starting from a weaker position than one who arrives with a complete, organized file.
Always get the adjuster’s direct contact information before they leave. Send a same-day email summarizing what they said they’d include. That email becomes evidence if the written estimate comes back short.
Crowleyexteriors: free inspections and claim support in St. Charles County
When you’re dealing with storm damage, the last thing you need is to figure out documentation and adjuster logistics alone.

Crowleyexteriors has served St. Charles County homeowners for over 25 years, and a significant part of that work is helping people navigate the roof insurance claim process from inspection through final invoice. The team provides free roof inspections with written contractor reports, attends adjuster meetings to advocate for a complete scope, and supplies the signed final invoices that release recoverable depreciation under RCV policies. When storm damage extends to siding or gutters, Crowleyexteriors documents those items too — so nothing gets left off the claim. Schedule your free inspection and no-obligation estimate today and get a clear picture of what you’re working with before you call your carrier.
Authoritative resources for homeowners
- NAIC — ACV vs. RCV explained: What’s the difference between Actual Cash Value and Replacement Cost coverage? — the clearest plain-language breakdown of how each policy type pays out.
- NOAA Storm Events Database: Ncdc — pull official storm confirmation reports by date and location to attach to your claim file.
- State Department of Insurance directories: NAIC State Insurance Departments — find your state DOI to file a complaint or check carrier response-time requirements.
- Filing timelines and state differences: OneClick Code — How long do homeowners have to claim hail damage?
- Documentation best practices: Teague Roofing — Documenting Roof Damage for Insurance and Best Recourse — How to Document Roof Damage
- Exterior maintenance and its effect on claims: Why regular exterior maintenance saves your home — useful context on how upkeep history affects coverage decisions.
This article is general information, not a substitute for advice from a qualified financial advisor. Consult a qualified financial professional about your own circumstances before acting on anything here.
Sources
- What’s the difference between Actual Cash Value coverage and Replacement Cost coverage?
- File a Roof Insurance Claim: Step-by-Step Guide | Roof Policy