


If you find missing shingles, dented gutters, granule loss, exposed underlayment, or new water stains in your attic after a recent storm, treat your roof as storm-damaged and act immediately. The actions you take in the first 72 hours determine whether your insurance claim succeeds, whether secondary water damage spreads, and whether you end up paying far more out of pocket than you should.
Emergency checklist for the first hour:
- Stay off the roof. Keep family and pets away from the structure until you know it is safe.
- Avoid any downed power lines near the house.
- Walk the perimeter from the ground and note visible damage without touching anything yet.
- Go into the attic with a flashlight. Look for daylight, water tracks on rafters, wet insulation, or new stains on the decking.
- Take timestamped photos and video of everything you see, inside and out.
- Note the date and time of the storm and save any local weather alerts you received.
- Keep receipts for any emergency purchases (tarps, buckets, plywood).
- Do not throw away damaged shingles, flashing, or tiles. The adjuster needs to see them.
Key Takeaways
After a storm, the homeowners who protect their claim and minimize out-of-pocket costs are the ones who document first, call their insurer within 24 hours, and hire a licensed local contractor before making any permanent repairs.
| Point | Details |
|---|---|
| Safety before anything else | Stay off the roof; avoid downed power lines; confirm the structure is stable before entering. |
| Document everything immediately | Timestamped photos, video, attic check, and a NOAA storm-event record anchor your claim date. |
| Know your deductible type | Wind/hail percentage deductibles can reach thousands of dollars on a mid-value home; check your declarations page now. |
| File promptly, repair temporarily | Report the claim within 24 hours; tarp open areas and save receipts, but make no permanent repairs before the adjuster visits. |
| Crowleyexteriors: free local inspection | St. Charles County homeowners get a no-obligation inspection, adjuster support, and a 25-year workmanship guarantee. |
Table of Contents
- What causes storm damage to your roof?
- What does storm roof damage actually look like?
- How to inspect your roof safely after a storm
- What to do in the first 24–72 hours after a storm
- How does homeowners insurance handle storm roof damage?
- When should you hire a roofer, and how do you pick the right one?
- How Crowleyexteriors supports St. Charles County homeowners after a storm
- The part of storm damage advice most homeowners get wrong
- Crowleyexteriors: free storm inspections for St. Charles County homeowners
- Sources
What causes storm damage to your roof?
Wind, hail, rain, debris, and the age of your roof each attack the structure differently, and knowing which mechanism caused the damage helps you explain the loss clearly to an adjuster.
Wind uplift is the most common culprit. Strong gusts create negative pressure at shingle edges and ridge lines, peeling shingles back or tearing them off entirely. Once an edge lifts, rain drives underneath and soaks the decking within minutes.
Hail is the sneakiest. A hailstone does not need to punch through a shingle to cause a claim-worthy loss. It bruises the asphalt mat, fractures the granule bond, and strips the protective coating. Hail damage can be nearly invisible from the ground until a subsequent rain washes the loosened granules off, which is why prompt inspection within 30 days of a hail event matters for preserving claimability.
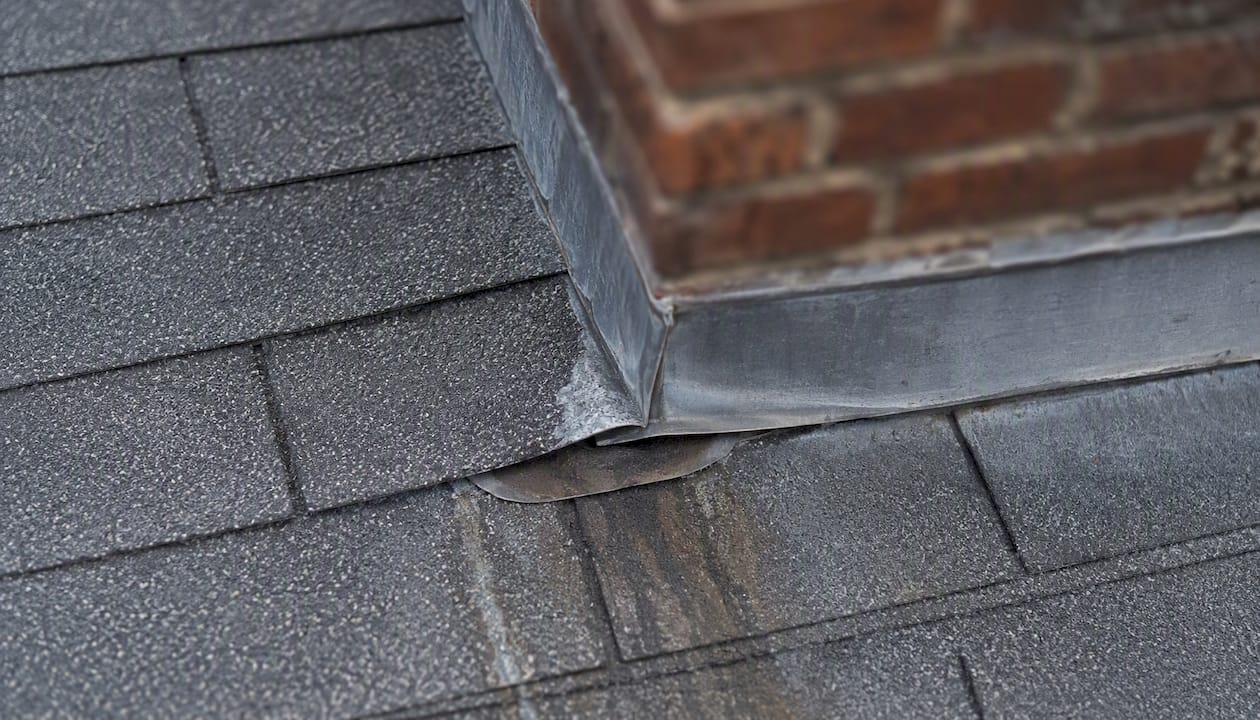
Wind-driven rain exploits any gap in flashing around chimneys, skylights, and pipe boots. A roof that looked fine before the storm can develop a steady interior drip from nothing more than a lifted piece of counter-flashing.
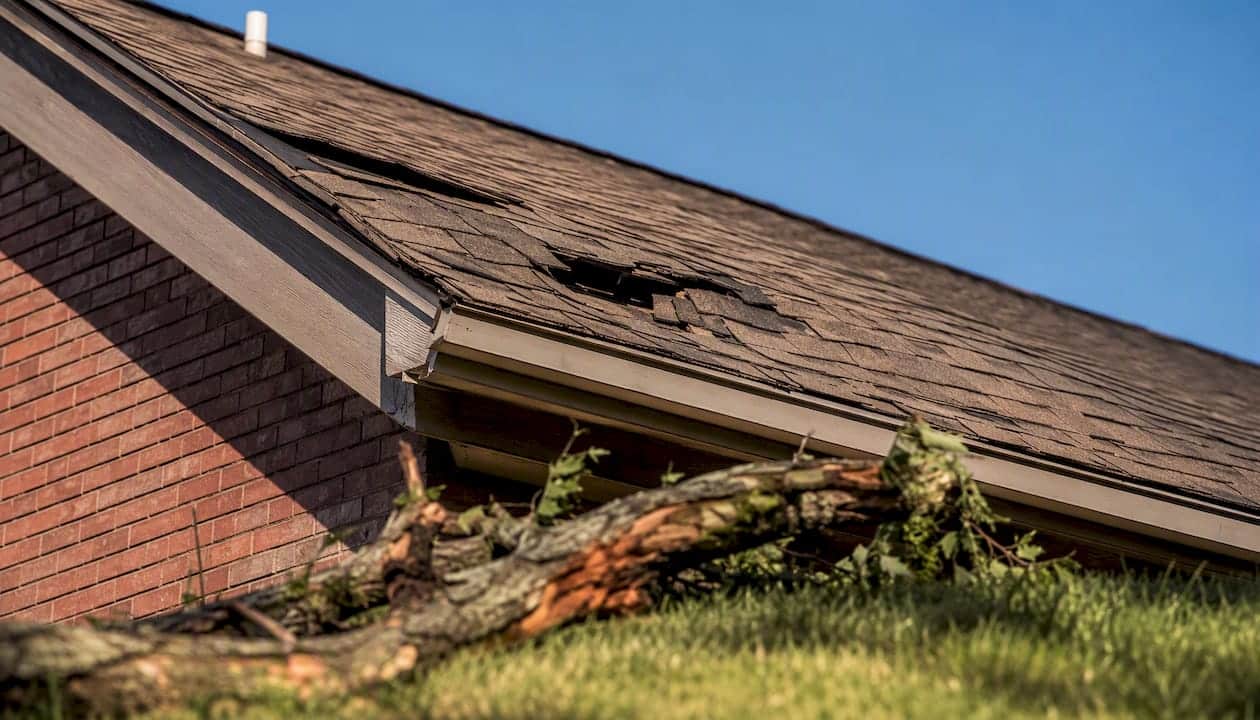
Falling debris, whether a tree limb or a neighbor’s fence panel, causes concentrated impact damage. These strikes often crack decking beneath the shingles, a problem invisible from the surface.
Age and deferred maintenance multiply every risk above. A roof already past its expected service life, with brittle shingles and cracked caulk around flashings, fails under wind speeds that a well-maintained roof would handle without a scratch. IBHS Fortified standards show that construction upgrades like sealed roof decks and impact-resistant shingles meaningfully reduce damage from both wind and hail, which is worth considering when you eventually replace the roof.
Severe weather is not rare in Missouri. Hail and wind events across the Midwest cause hundreds of millions of dollars in residential roof damage each year, which is precisely why a fast, methodical response matters.
What does storm roof damage actually look like?
According to GAF’s storm damage guidance, the primary indicators split cleanly into exterior signs, gutter and edge clues, and interior/attic evidence. Here is what to look for on each material type.
| Damage type | Asphalt shingles | Metal panels | Tile (clay/concrete) | Wood shakes |
|---|---|---|---|---|
| Wind | Missing, lifted, or curled shingles | Raised seams or fastener pull-through | Cracked or displaced tiles | Split or missing shakes |
| Hail | Dark bruise spots, granule loss | Round dents across surface | Chips or star-shaped cracks | Splits with fibrous edges |
| Debris impact | Punctures, torn tabs | Dents or bent panels | Broken or shattered tiles | Gouges or missing sections |
| Water intrusion sign | Stains at valleys and eaves | Rust streaks at seams | Stains at mortar joints | Dark streaks, moss growth |
Exterior signs to photograph:
- Missing, lifted, or curled shingles anywhere on the field or at ridge caps
- Exposed black underlayment where shingles have blown off
- Granule loss visible as bare, shiny patches on asphalt shingles
- Cracked, chipped, or displaced tiles on clay or concrete roofs
- Dents on metal panels, flashing, or ridge caps
- Separated or bent flashing at chimneys, skylights, and pipe boots
- Debris impact marks or punctures
Gutter and roof-edge clues:
- Granule piles in gutters or at downspout outlets (a major hail indicator)
- Dented or crushed gutter sections
- Displaced drip edge or fascia
- Separated gutter seams from impact or debris
When you see heavy granule accumulation in your gutters after a storm, that is not cosmetic. It signals that the protective layer on your shingles is gone, and the asphalt mat underneath is now exposed to UV and water.
Interior and attic clues:
- New water stains on ceiling drywall or attic sheathing
- Wet or compressed insulation
- Daylight visible through the decking boards
- Musty odor that was not present before the storm
- Active drips or water tracks along rafters
Pro Tip: Photograph each sign with a wide-angle shot for context and a close-up for detail. For gutters, photograph the granule accumulation next to a ruler or coin for scale. These paired shots are far more persuasive to an adjuster than a single blurry image.
How to inspect your roof safely after a storm
Start from the ground. Binoculars let you scan the ridge line, eaves, valleys, chimney flashings, and vent boots without setting foot on a ladder. Walk all four sides of the house slowly and photograph anything that looks out of place.
Then go into the attic before you do anything else outside. Bring a bright flashlight and look for:
- Daylight coming through the decking
- Water stains or dark streaks on rafters and sheathing
- Wet, matted, or discolored insulation
- Any active dripping
The attic check often reveals damage that is completely invisible from the exterior, especially after wind-driven rain events where flashing has lifted but shingles remain in place.
Safety rules that are non-negotiable:
- Do not climb onto a wet, damaged, or structurally suspect roof under any circumstances.
- Stay well clear of any downed or sagging power lines near the roofline.
- Do not use a ladder against a gutter that has been bent or partially detached.
- After a tornado or major structural event, wait for a professional structural assessment before entering the attic.
Hail damage in particular demands professional eyes. Because hail bruises the asphalt mat and strips granules in ways that are hard to detect from the ground, a licensed roofer with rooftop access is often the only way to confirm the full extent of the loss before you file a claim.
What to do in the first 24–72 hours after a storm
Time matters here. Insurance policies require prompt notice, and secondary water damage that develops because you waited is often excluded from the original storm claim.
Hour 1: Safety and initial documentation
- Confirm everyone is safe and the structure is stable enough to enter.
- Do your ground-level and attic inspection (see above).
- Take timestamped photos and a video walkthrough of all damage.
- Note the exact date and time of the storm.
Day 1: Notify and mitigate
- Call your insurance company and open a claim. Report the date, time, and nature of the damage you observed. The NAIC post-disaster claims guide recommends filing as soon as you decide to make a claim.
- Look up the storm event on NOAA’s storm events database and save or screenshot the record for your address and date. This is the document adjusters and insurers use to verify that a qualifying event occurred.
- Arrange emergency tarping over any open areas. A standard polyethylene tarp secured with furring strips is the safest DIY option. Keep all receipts.
- Move valuables away from areas with active leaks.
What NOT to do:
- Do not make permanent repairs before the adjuster inspects the damage.
- Do not sign an assignment-of-benefits agreement with a contractor you just met.
- Do not pay a large upfront deposit before a written scope of work is agreed.
- Do not discard damaged shingles, tiles, or flashing pieces.
Days 2–7: Estimates and adjuster meeting
- Contact a licensed local roofing contractor for an independent inspection and written estimate.
- Schedule the adjuster visit and plan to be present with your photos, receipts, and contractor estimate in hand.
- If the storm was part of a federally declared disaster, check FEMA’s individual assistance programs for supplemental recovery options.
How does homeowners insurance handle storm roof damage?
Homeowners insurance typically covers wind, hail, lightning, falling objects, and sudden water intrusion, but the payout depends heavily on your policy’s deductible structure and valuation method. Getting this wrong costs homeowners thousands.
Step-by-step claim checklist:
- Report the claim promptly with the storm date, time, and a description of observed damage.
- Provide your photo and video documentation.
- Submit receipts for any emergency temporary repairs.
- Ask your insurer specifically whether a wind/hail percentage deductible applies.
- Confirm whether your policy pays ACV or RCV.
- Request an itemized estimate from the adjuster and compare it line by line against your contractor’s estimate.
Deductible structures: what surprises homeowners
Many policies no longer use a flat-dollar deductible for wind and hail. Instead, they apply a percentage deductible tied to your home’s insured dwelling value, which can significantly increase your out-of-pocket costs compared to a flat deductible amount.
ACV vs. RCV: the payout gap
| Policy type | How it pays | What it means for you |
|---|---|---|
| Actual Cash Value (ACV) | Replacement cost minus depreciation | Older roofs receive less because depreciation is factored in; you may have to cover the difference |
| Replacement Cost Value (RCV) | Full replacement cost minus your deductible | You pay only the deductible; insurer covers the rest |
The NAIC’s claims guide confirms that ACV vs. RCV distinctions can dramatically affect final payout. Check your declarations page now, before you need to file, so the number does not shock you later.
Meeting the adjuster:
Have a licensed contractor present if at all possible. GAF’s insurance claims guidance notes that a contractor who can walk the adjuster through observed damage and provide a line-item estimate strengthens the homeowner’s position considerably. Document every conversation with the adjuster in writing. If the first offer seems low, you have the right to request a re-inspection or hire a public adjuster.
One more thing: a contractor who offers to waive your deductible is offering something that is illegal in many states and can jeopardize your entire claim. Insurers routinely require proof that the homeowner paid the deductible before releasing funds.
When should you hire a roofer, and how do you pick the right one?
Some damage you can document yourself. But the moment you see active leaks, structural concerns, more than a third of the surface affected, or any suspected hail damage, you need a licensed professional on that roof.
Clear signals to call a pro:
- Active interior leaks or spreading ceiling stains
- Visible decking damage or sagging roof sections
- More than a few missing shingles across multiple areas
- Any suspected hail event, even if ground-level signs are subtle
- Flashing failures at chimneys, skylights, or valleys
- You are not comfortable with heights or ladder work
Contractor vetting checklist:
- Verify the contractor holds a current state license and carries general liability plus workers’ compensation insurance. Ask for certificates, not just verbal confirmation.
- Request at least two local references from storm restoration work completed in the past two years.
- Get a written, line-item estimate that specifies materials (manufacturer, product line), labor, and warranty terms.
- Confirm the workmanship warranty in writing. A reputable contractor stands behind the installation, not just the materials.
- Ask whether they have experience working directly with insurance adjusters and whether they will attend the adjuster inspection.
Pro Tip: Search your state’s contractor licensing board online before signing anything. A five-minute check tells you whether the license is active, whether there are complaints on file, and whether the insurance certificates are current.
Red flags that should end the conversation immediately:
- An unsolicited knock on the door the day after a storm from a contractor you have never heard of
- Any request to sign an assignment-of-benefits form before work begins
- An offer to “cover your deductible” or submit an inflated estimate to offset it
- A demand for more than 10–15% upfront before materials are ordered
- No physical local address or no verifiable references
Storm-chasers follow severe weather events and target neighborhoods with visible damage. They often disappear after collecting payment, leaving homeowners with incomplete work and no recourse. A locally established contractor with a verifiable track record is the only safe choice.
How Crowleyexteriors supports St. Charles County homeowners after a storm
Crowleyexteriors is a family-owned roofing company with more than 25 years of experience serving St. Charles County. After a storm, the process is straightforward: a free inspection, a documented estimate, and a dedicated contact who stays with the job from the first call to the final walkthrough.
The inspection covers the full exterior: roof field, ridge, valleys, flashings, gutters, and siding. If emergency tarping is needed, Crowleyexteriors handles it and documents the work for your insurer. When the adjuster visits, the team can be present to walk through the findings and support your claim with a line-item estimate.
Roof replacements come with a 25-year workmanship guarantee. If the storm also damaged your siding or gutters, those services are handled by the same crew under the same estimate, which simplifies the insurance documentation considerably.
There is no pressure and no obligation. Crowleyexteriors provides transparent pricing and a written scope before any work begins, so you know exactly what you are agreeing to.
The part of storm damage advice most homeowners get wrong
The standard post-storm checklist advice is not wrong, but it is incomplete in one critical way: it treats documentation as a box to check rather than the actual foundation of your claim.
Adjusters assess losses against policy language, and the homeowners who get full replacement cost are almost always the ones who show up to the adjuster meeting with a complete, timestamped photo file, a NOAA storm-event record, and an independent contractor estimate in hand. The ones who get lowball ACV offers are typically the ones who called the insurer, waited for the adjuster, and hoped for the best.
The other piece of conventional advice that fails homeowners is the assumption that the adjuster’s first offer is the final word. It is not. You have the right to request a re-inspection, hire a public adjuster, or invoke the appraisal clause in your policy if the numbers are far apart. Most homeowners do not know this, and insurers are not obligated to tell them.
What actually matters most: do the ground-level and attic inspection yourself within hours of the storm, get a licensed local contractor on the roof within days, and have that contractor present when the adjuster arrives. That sequence, more than any other single action, determines whether your claim pays what the damage actually costs.
Crowleyexteriors: free storm inspections for St. Charles County homeowners
When a storm hits St. Charles County, the gap between a well-documented claim and a denied one often comes down to who inspected the roof first and how thoroughly. Crowleyexteriors fills that gap with a free, no-obligation inspection that gives you an independent, written assessment before the adjuster ever sets foot on your property.

With more than 25 years serving the St. Charles County area, Crowleyexteriors handles the full scope: emergency tarping, documented estimates, adjuster meetings, roof replacement with a 25-year workmanship guarantee, and combined exterior work when storm damage reaches your siding or gutters. No pressure, no obligation, and transparent pricing from the first conversation.
Contact Crowleyexteriors today to schedule your free post-storm inspection and protect both your home and your claim.
Sources
These agencies and organizations are the authoritative starting points for verifying storm events, understanding your rights, and finding mitigation guidance.
- Understanding Roof Storm Damage: Causes, Signs, How to Inspect and Next Steps | GAF
- Storm recovery tips | Texas Department of Insurance
- Post-Disaster Claims Guide | NAIC
- NOAA National Centers for Environmental Information — Storm Events
- FEMA individual assistance programs
- IBHS Fortified
- Does home insurance cover storm damage? | Progressive
- Hail damage roof claims: When to file, when to wait, and how long you have | Truvo