

A typical roof replacement follows a short, predictable order: crews prep and protect the site, tear off the old roofing, repair any damaged decking, install underlayment and flashing, lay new shingles, then clean up and walk you through a final inspection. Most single-family homes take a few days from start to finish. Before crews arrive, confirm your dates in writing and make sure your estimate is itemized, not a single lump sum.
TL;DR:
- Homeowners should move vehicles, clear fragile items, and remove or cover outdoor plants at least a week before roof replacement to help prevent damage and speed cleanup.
- Inspecting attic water stains before installation can provide a baseline to clarify if damages are pre-existing or caused during the project.
- Verify that contractors include decking repairs, proper ventilation, flashing, and underlayment in their written estimates to prevent unexpected costs or leaks.
- Speak with your contractor about handling roof accessories like solar panels and satellite dishes to avoid delays or damage during installation.
- Always review final cleanup procedures, including nail sweeps and warranty documentation, before signing off on the completed roof.
Table of Contents
- What Happens Before Roofers Arrive at Your House?
- What Happens on the First Day of a Roof Replacement?
- How Does Tear-Off and Decking Inspection Work?
- What Goes Under the Shingles, and Why Does It Matter?
- How Are Shingles Installed and What Should the Finished Roof Look Like?
- What Should a Final Roof Inspection and Cleanup Include?
- How Long Does a Roof Replacement Take and What Drives the Cost?
- What Should You Ask a Roofing Contractor Before Signing?
- A local perspective on the roof replacement process
- Get a Free Roof Inspection From Crowley Exteriors
- Sources
What Happens Before Roofers Arrive at Your House?
Getting your property ready isn’t just about being polite to the crew. It changes how fast the job goes and how much of a mess is left behind. Homeowner prep like moving cars, cutting the grass, and unlocking gates measurably speeds up cleanup and cuts the odds of stray nails causing damage later.
Handle these in the one to four weeks before your scheduled start date:
- Move vehicles out of the driveway and garage, and mow the lawn short so dropped nails and debris are more visible.
- Take fragile items down from garage shelves and attic storage. Vibration from tear-off can knock things loose you wouldn’t expect.
- Remove framed pictures and mirrors from walls, especially on upper floors directly under the roofline.
- Clear a 15-foot perimeter around the house and cover delicate plants or garden beds with tarps.
- Unlock side gates and let neighbors know a few days ahead. Falling debris and truck noise are easier to forgive with a heads-up.
- Snap a few photos of your driveway, siding, and landscaping before the crew arrives, and confirm with your contractor whether they’re pulling the permit or you are.
Pro Tip: Walk your attic with a flashlight the week before installation and note any existing water stains or daylight gaps. That gives you a clear “before” picture if a dispute ever comes up about pre-existing damage.
What Happens on the First Day of a Roof Replacement?
Materials typically show up before the crew does, or right alongside them. Shingles get staged on the driveway or lawn near the roofline, and a dumpster or debris trailer gets positioned for easy loading, usually as close to the house as the driveway allows.
From there, the setup follows a routine sequence:
- Crews lay tarps and plywood along the foundation, walkways, and any windows directly beneath the work area.
- Drop cloths and gutter guards go up to keep granules and nails out of your landscaping and downspouts.
- A supervisor or foreman identifies themselves as your point of contact for the day, someone you can flag down with questions instead of interrupting whoever’s on the ladder.
- Work generally runs from early morning into late afternoon, and a typical single-family roof takes one to three days depending on size and complexity.
- If you have satellite dishes, solar panels, or window air conditioners near the roofline, ask ahead of time how those get handled. Some crews detach and reinstall; others need you to arrange it separately.
Stay off the roof and out of the immediate work zone once tear-off starts. It sounds obvious, but curious homeowners wandering into the debris drop zone is a common cause of avoidable injuries.
How Does Tear-Off and Decking Inspection Work?
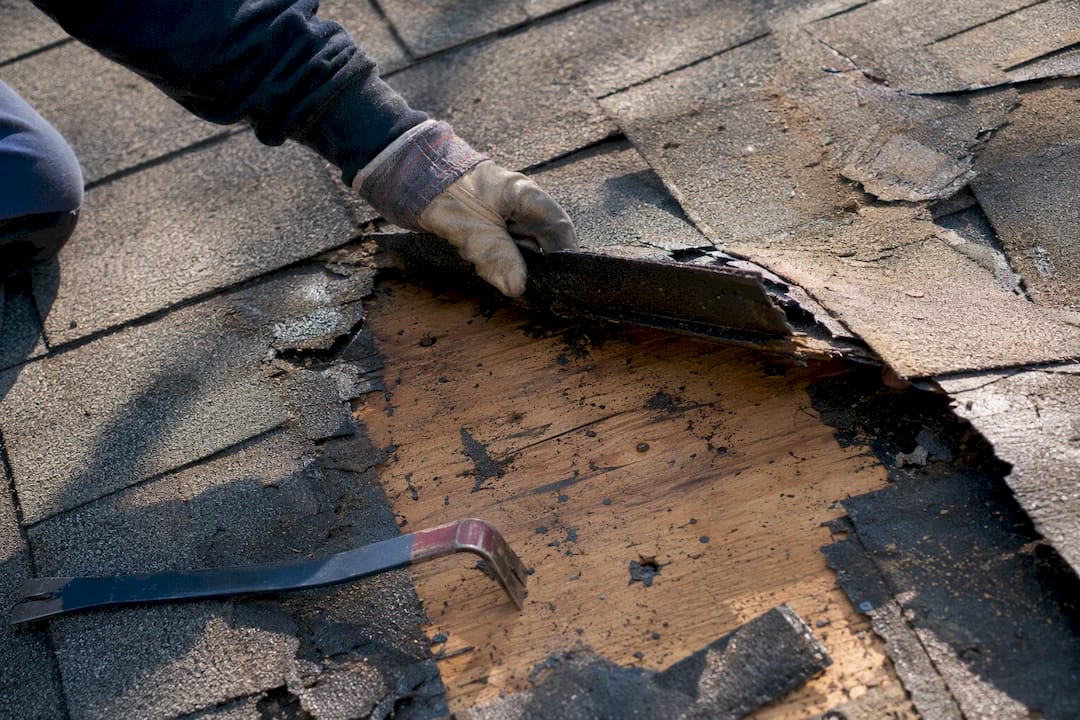
Tear-off is exactly what it sounds like: the old shingles, underlayment, and flashing come off down to the wood decking. A single layer of shingles comes off faster than a roof with two or three layers stacked from prior “roof-overs,” and disposal happens continuously through the day rather than at the end.
Once the decking is exposed, the crew inspects every sheet for rot, soft spots, and delamination, usually by walking the surface and probing suspect areas.
- Soft or spongy sections almost always mean water has been getting in longer than anyone realized.
- Damaged sheets get replaced individually rather than the whole deck getting torn out, which is why estimates should include a per-sheet decking repair allowance rather than assuming zero repairs.
- Because hidden decking damage discovered mid-tear-off is one of the most common sources of change orders, ask your contractor upfront what the per-sheet rate is and require photos before any repair work gets added to your bill.
- Get any change order in writing, with a price and a photo of the damage, before work continues.
- Some contractors recycle old asphalt shingles where local facilities accept them. Ask if that’s an option in your area if you’d rather the material not go straight to a landfill.
What Goes Under the Shingles, and Why Does It Matter?
The layers you never see are the ones that actually keep water out. Skimping here is the single most common way a roof replacement looks fine on day one and leaks by year three.
Underlayment comes in two main types: traditional felt paper and synthetic underlayment, which has become the more common choice for its tear resistance and moisture protection. Ice and water shield, a self-adhering waterproof membrane, goes down first along eaves, valleys, and around chimneys, the spots most prone to ice damming and pooling water.
- Drip edge metal wraps the roof perimeter to direct water into the gutters instead of behind the fascia.
- Valley protection, step flashing, and chimney flashing seal the transitions where two roof planes meet or where the roof meets a vertical surface, which is where most leaks originate.
- Ridge vents paired with soffit intake vents create balanced airflow through the attic, and that airflow is directly tied to how long your shingles last, since trapped heat and moisture accelerate shingle breakdown from underneath.
- Some municipalities now require upgraded ventilation or wind-mitigation features as part of a permitted re-roof, which can add scope beyond what an older quote might have assumed.
How Are Shingles Installed and What Should the Finished Roof Look Like?
Shingle installation follows a specific order, and skipping steps in that order is one of the easiest ways to spot a rushed job.
- A starter strip goes down along the eaves first. It’s a specialized shingle designed to seal the first course and resist wind uplift at the roof’s edge.
- Field shingles go up row by row from the bottom, each nailed in a consistent pattern, typically four to six nails per shingle, well within the shingle’s nailing zone rather than too high or too low.
- Flashing gets integrated as the crew works around vents, skylights, and chimneys, not slapped on top after the fact.
- Ridge cap shingles finish the peak, sealed and nailed to close out the top of every slope.
At your walkthrough, look for straight, evenly spaced courses, tight seals around every penetration, and ridge caps that lie flush without visible gaps. Wavy lines, exposed nail heads, or caulk smeared over flashing instead of proper metal work are signs to ask questions before you sign off.
What Should a Final Roof Inspection and Cleanup Include?
Cleanup is where a lot of otherwise good crews cut corners, and it’s worth checking closely before the trucks pull away.
- A magnetic nail sweep of the driveway, walkways, and surrounding grass to pull up stray nails and screws.
- Visual inspection of landscaping beds, gutters, and downspouts for leftover shingle granules or debris.
- Confirmation that the dumpster or debris trailer has actually been removed, not just scheduled for pickup.
- A walkthrough covering flashing, vents, ridge caps, and gutters, ideally with photos taken and shared with you.
- Two separate warranties to get in writing: a workmanship warranty covering the contractor’s labor, and the manufacturer’s warranty covering the shingles themselves, plus instructions for how to file a claim under each.
How Long Does a Roof Replacement Take and What Drives the Cost?
Most straightforward single-family roofs take a few days. Steep pitches, multiple layers to tear off, dormers, chimneys, and skylights all add time, and a complicated roof can take longer.
Cost has climbed sharply in recent years. National average residential roof replacement cost rose to roughly $17,631, a jump driven as much by scope as by shingle prices.
- Roof size measured in squares (100 square feet per square) is the baseline cost driver, but pitch and roof complexity multiply labor time on top of that.
- Material choice ranges from standard asphalt shingles to metal, tile, or premium architectural shingles, each with a different price per square.
- Decking repairs, permit fees, and local labor rates vary by region and can add unplanned cost mid-project.
- Code-driven scope inflation is a real factor: required ventilation upgrades and wind-mitigation work have pushed costs up independent of material prices since 2021.
The safest move is getting two or three itemized estimates and lining them up scope-for-scope. A quote that’s dramatically lower than the others is usually missing something, whether that’s ice and water shield, adequate ventilation, or a decking repair allowance. Our roof estimate checklist walks through exactly what a complete bid should include, and our roof replacement timeline guide breaks down how project size affects scheduling.
What Should You Ask a Roofing Contractor Before Signing?
A little diligence upfront prevents most of the disputes that come up later.
- Ask to see proof of insurance and licensing, and confirm who is responsible for pulling the permit.
- Get the exact material brand and product line in writing, not just “architectural shingles.”
- Ask who supervises the crew on-site and how issues get communicated during the day.
- Confirm the cleanup plan, including the nail sweep, before work begins.
Watch for red flags: a contractor demanding a large payment upfront, a contract with vague scope language, no written workmanship warranty, or an inability to provide local references. A reasonable payment schedule usually ties partial payments to material delivery and job completion rather than requiring full payment before work starts.
Pro Tip: Keep every piece of paperwork in one folder, physical or digital: the signed contract, material spec sheet, both warranties, and any lien waivers from subcontractors. You’ll want all of it in one place if you ever sell the house or file an insurance claim.
Homeowners weighing whether to do prep work themselves versus hiring it out for other exterior projects sometimes run into the same decision-making patterns; general guidance on DIY versus contractor trade-offs applies just as well to roofing as it does to other home improvement work. And once the dumpster’s gone, a seasonal yard cleanup checklist is a solid next step for restoring any landscaping that took a hit during the job.
A local perspective on the roof replacement process
Every step in this guide corresponds to common practices observed in professional roofing jobs. With experience in roofing projects in the St. Charles County area, typical issues include skipped decking checks, vague verbal estimates, and cleanup that gets rushed at the end of the day.
Free inspections and no-obligation estimates allow homeowners to see the real scope before committing, not after tear-off reveals a surprise. When decking repairs come up mid-project, contractors often document them with photos and a price before continuing any work. Some companies offer long-term workmanship guarantees to ensure the work holds up well beyond the initial walkthrough.
— Mario
Get a Free Roof Inspection From Crowley Exteriors
Crowley Exteriors gives St. Charles County homeowners something a lot of quotes skip: a free, no-obligation inspection with a written, itemized estimate you can actually compare against other bids line by line.

That inspection covers your decking, flashing, ventilation, and overall roof condition, and it comes with a straightforward next step, not a pressured sales pitch. If the roof needs work, you’ll get a clear scope and price backed by our 25-year workmanship guarantee. If it doesn’t, you’ll know that too. Visit our roof replacement services page to schedule your free inspection, and have your recent utility or insurance paperwork handy in case storm damage is part of the conversation.
Sources
- 2026 Roofing Cost Report: National + Regional Data | TRB
- How to Prepare for a Roof Replacement – IKO North America
- What to Expect During a Roof Replacement – Owens Corning