


Weatherstrip the sash, re-caulk the frame gaps, and add shrink-fit window film. That’s the fastest way to cut window drafts in winter, and most of it takes an afternoon and under $50 in materials. If you spot fog trapped between the panes or the same draft comes back every year no matter what you do, that’s a structural failure, not a sealing problem, and it’s time to talk replacement. Before you touch a caulk gun, confirm the leak is actually coming from the window and not sneaking in through the attic or basement instead.
TL;DR:
- Sealing gaps around sash-to-frame and frame-to-wall can significantly reduce drafts if done with proper materials and during suitable weather conditions.
- Persistent fog between panes or recurring drafts after sealing indicate the window requires replacement, not just maintenance.
- Exterior caulk needs daytime temperatures above 35 to 40 degrees Fahrenheit to cure correctly, so plan repairs accordingly.
- Using incorrect materials, such as expanding foam in sash tracks or sealing hardware shut, can cause permanent window damage.
- Professional inspections are recommended for widespread leaks or structural problems, offering precise diagnosis and proper repair or replacement options.
Table of Contents
- What Causes Window Drafts and Why They Matter for Your Bills
- How to Find the Leaks Before You Fix Anything
- Cheap Fixes That Actually Work This Winter
- When a Draft Means Replacement, Not a Repair
- Get the Order Right: Diagnose, Seal, Then Decide on Glass
- Where Crowley Exteriors Fits In
- My Take: Don’t Overthink This, Just Sequence It Right
- Request a Free Window Inspection From Crowley Exteriors
- Sources
What Causes Window Drafts and Why They Matter for Your Bills
A drafty window almost never fails all at once. It’s usually one of five specific breakdowns: a gap where the frame meets the wall, a loose fit between the sash and frame, a failed seal inside a double-pane unit, a warped sash or broken lock that won’t pull the window tight, or caulk and weatherstripping that’s simply dried out and cracked.
Here’s what’s actually happening at each failure point:
- Frame-to-wall gaps form as houses settle and old caulk shrinks, leaving a channel straight to the outside.
- Sash-to-frame leaks happen when the moving part of the window no longer presses snugly against the fixed frame.
- Failed insulated-glass seals let the gas or air between panes escape, which is why you sometimes see fogging.
- Warped sashes or broken locks stop the window from closing with even pressure across the whole frame.
- Degraded caulk and weatherstripping just wear out. Foam and caulk degrade over time, losing their effectiveness as seals.
There’s a bigger mechanic at play, too. Warm air rising and escaping through attic gaps creates negative pressure that pulls cold air in wherever it can, including around window frames. Energy Star’s own guidance points out that the biggest leaks in a house are usually hidden in the attic and basement, not at the windows themselves. That doesn’t mean windows aren’t worth sealing. They’re one of the most visible, cheapest, and fastest problems to fix yourself, which makes them a smart place to start even if they’re not the single biggest culprit in the house.
How to Find the Leaks Before You Fix Anything
Guessing wastes caulk and time. Run through these checks on a cold, windy day, when the pressure difference between inside and outside air makes leaks obvious.
- The paper test. Close a window on a strip of paper. If you can pull it out without resistance, the sash isn’t compressing tight enough against the frame.
- The incense or smoke test. Hold a lit incense stick near the frame edges and watch the smoke. A steady stream that gets pulled sideways means air is moving through a gap.
- The hand or wet-hand test. Run a damp hand slowly around the frame perimeter. Moving air feels distinctly cooler than still air, even in a warm room.
- A visual check for daylight and loose hardware. Look for light coming through closed sashes, and check whether locks pull the window fully shut or just close it loosely.
If the leak seems widespread or you can’t pinpoint it, a professional energy auditor can run a blower-door test or scan the house with a thermal camera. A blower-door test and thermal imaging depressurizes the house and maps every leak path at once, which is the only way to catch hidden losses in wall cavities or attic penetrations that a DIY test will miss.
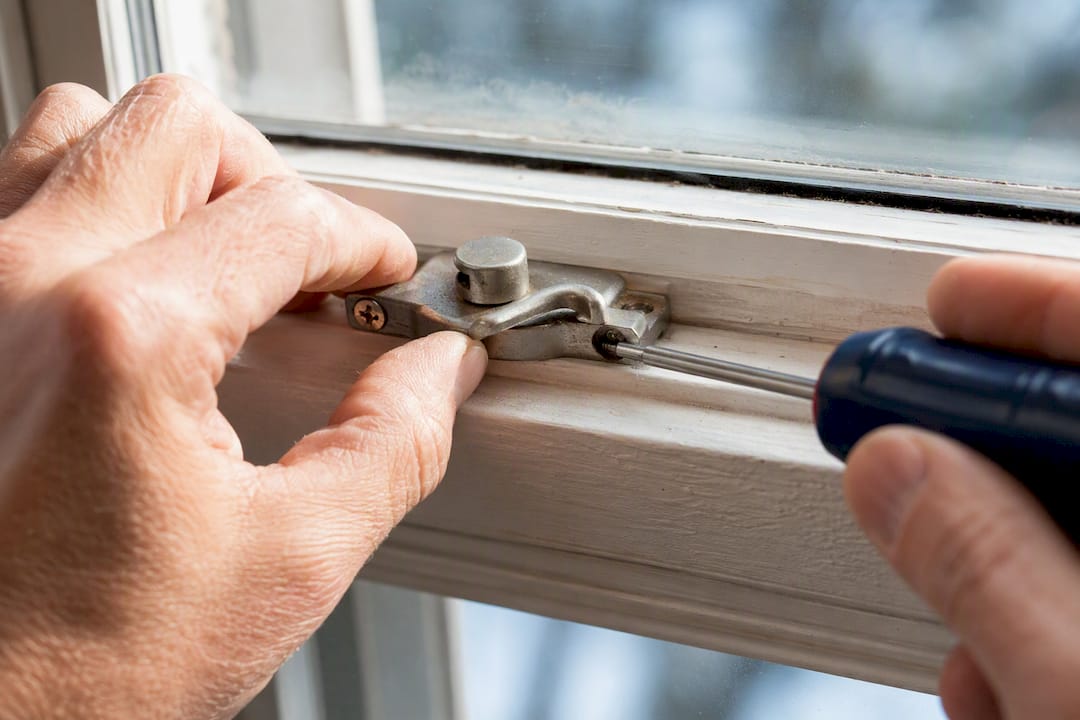
Pro Tip: If the paper test fails on a window with an intact lock, check the lock itself first. A loose or broken sash lock is often the actual problem, and it’s a five-minute hardware fix instead of a full weatherstripping job.
Cheap Fixes That Actually Work This Winter
Once you know where the air is getting in, match the fix to the gap. Different problems call for different materials, and using the wrong one wastes money or makes the window harder to operate.
For the sash-to-frame gap, you’re choosing between V-strip weatherstripping, adhesive foam tape, or a brush sweep. Tensioned V-strip holds its shape and keeps pressing against the sash instead of flattening out, so it tends to outlast adhesive foam tape by a wide margin, often lasting 5 to 10 years versus a season or two for foam. Foam tape is cheaper and easier for a quick fix, but expect to replace it annually. Brush sweeps work best on the bottom rail of sliding or double-hung windows where a strip won’t sit flush.
For frame-to-wall gaps, caulk is the right tool, and it comes with a real limitation: temperature. Exterior caulk and adhesives need daytime temperatures in roughly the 35 to 40 degree Fahrenheit range to cure properly. Apply it too cold and it won’t bond, and you’ll be redoing the job in spring anyway. Interior fixes like weatherstripping and window film can go on anytime, regardless of outdoor temperature, which makes them the fallback when a hard freeze hits before you get to the caulk gun.
For glass and sash units you don’t open all winter, shrink-fit window film is worth the $3 to $15 per window it typically costs. It shrinks tight with a hair dryer, adds a sealed air pocket over the glass, and peels off cleanly in spring without damaging trim or paint. Rope caulk is a similar stopgap: press it into gaps by hand, pull it out when the weather turns.
- Never spray high-expansion foam into a sash track or between moving parts. It expands more than you expect and can jam the window permanently.
- Don’t caulk a lock or hinge shut just because it stops a draft. You’ll need that hardware to open the window eventually.
- Skip glue-based “permanent” seals on any window you’ll want to open in summer.
Pro Tip: Clean and dry the frame surface before applying anything. Caulk and weatherstripping adhesive won’t bond to dust, old paint flakes, or moisture, and a fix applied over grime usually fails within weeks. If you’re weatherizing doors at the same time, the same prep principles apply. This door winterizing guide covers similar sweep and threshold fixes.
When a Draft Means Replacement, Not a Repair
Some windows aren’t worth sealing again. These are the signs that point to a structural failure rather than a maintenance gap:
- Fog or moisture trapped between the panes. This means the insulated-glass seal has failed and the gas fill is gone. No amount of exterior caulking fixes it.
- Visible wood rot or soft spots in the frame. Rot spreads, and caulking over it just traps moisture against already-weakened wood.
- Warped or bowed sashes. A frame this out of shape can’t press evenly against weatherstripping no matter how new the strip is.
- The same draft returns every winter despite fresh seals. Recurring drafts after a proper fix usually mean the frame itself has failed, not the seal on top of it.
A professional visit looks different from a DIY pass. Expect precise measurements, whole-house diagnostics if drafts are widespread, low-expansion foam applied correctly around the rough opening, and exterior caulking paired with proper flashing work. Before you sign anything, ask what the window replacement warranty covers and get the inspection findings in writing.
Get the Order Right: Diagnose, Seal, Then Decide on Glass
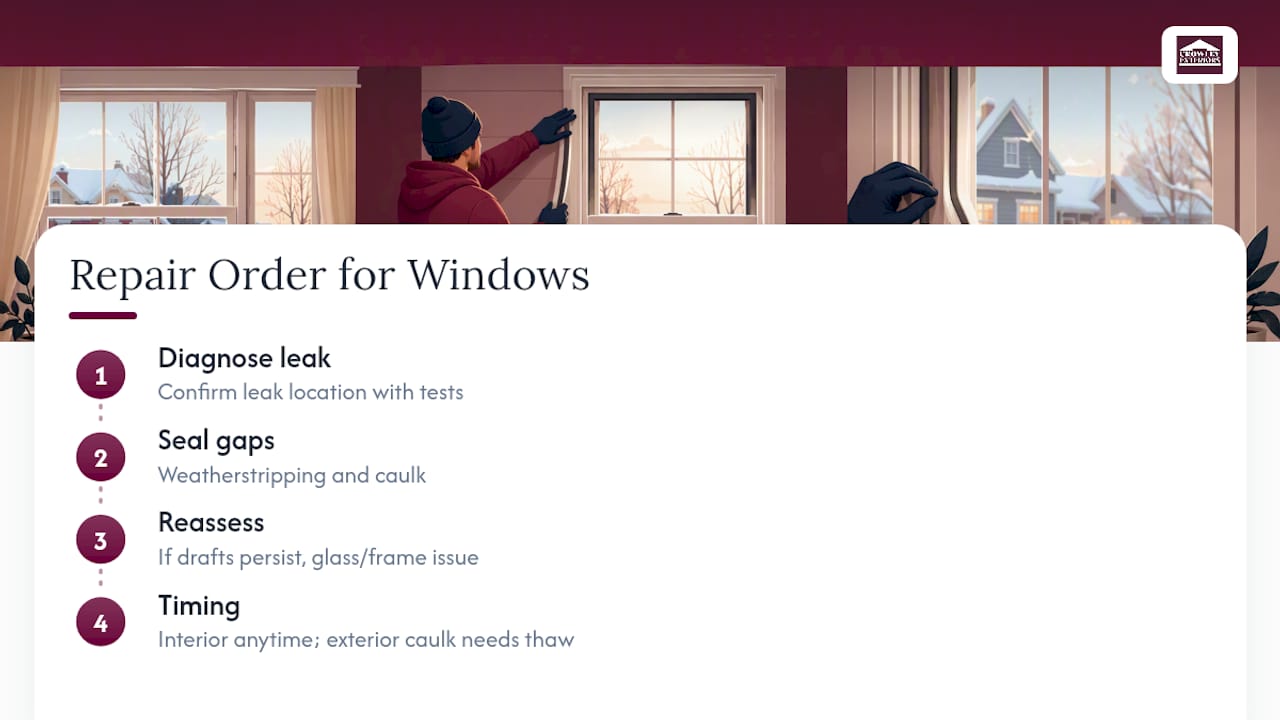
Fixing windows in the wrong order wastes money. Diagnose first, seal the cheap stuff second, and only consider glass or full-unit replacement once you know the frame itself is sound.
The sequence that gets the best return: confirm the leak location with the tests above, seal sash and frame gaps with weatherstripping and caulk, then reassess. If drafts persist after that, the glass unit or the whole window is likely the problem, not the seal around it.
Timing matters more than most people realize. Interior fixes like weatherstripping and film go on anytime. Exterior caulk needs that above-freezing window to cure, so plan those jobs for a mild stretch rather than the coldest week of January. Scheduling exterior work in cold weather has its own rules, which is also true for winter roofing projects.
On payback: sealed windows with fresh weatherstripping and film can meaningfully cut the heat loss through that specific window, and V-strip’s 5 to 10 year lifespan means you’re not repeating the job annually the way you would with foam tape. If you patch the same window three winters in a row, you’ve likely spent more on repeated materials than a proper repair would have cost, and the draft is telling you it’s a frame problem, not a seal problem.
Where Crowley Exteriors Fits In
If the DIY fixes above don’t hold, or you’d rather skip straight to a professional opinion, Crowley Exteriors has spent over 25 years working on homes across St. Charles County, and window performance is part of that exterior picture alongside roofing, siding, and gutters.
A professional inspection typically includes:
- A full check for frame rot, warping, and failed seals, not just a glance at the glass.
- Precise measurements and an honest read on whether repair or full replacement makes sense.
- A clear, itemized estimate with no obligation attached.
Some companies offer free inspections so you can get that answer before spending a dollar.
My Take: Don’t Overthink This, Just Sequence It Right
Here’s the honest version. Test first, weatherstrip and caulk second, add film if the window stays closed all winter, then go back out on the next cold day and check your work with your hand or a lit stick of incense. That loop catches almost everything fixable.
Where I see homeowners waste money is repeating the same patch job every October on a window that’s already failed structurally. If you’ve caulked the same frame three winters running and it’s still leaking, you’re not saving money anymore, you’re delaying a decision. One honest inspection settles the question for good. DIY buys you a season. A sound frame and seal buy you a decade.
— Mario
Request a Free Window Inspection From Crowley Exteriors
If you’ve run through the paper test, the caulk, and the film, and the draft is still there, stop guessing and get an actual answer. Crowley Exteriors offers free inspections that check frame condition, seal integrity, and hardware, then tell you plainly whether a repair holds or a full window replacement is the better investment.

Before the visit, jot down which windows draft, when you notice it most, and whether you’ve already tried sealing them. That saves time and helps the inspector zero in on the real problem faster. Estimates often come with no obligation attached, providing reassurance before committing to work. Visit the Crowley Exteriors site or reach out directly to get an inspection on the calendar before the next cold snap.
Sources
- Locating air leaks | ENERGY STAR
- Signs your windows need replaced | Pella
- How to fix a drafty window | Practical Home Guides
Recommended
This article was prepared with AI assistance for general information. For recommendations specific to your property, contact Crowley Exteriors. Call or text us at 314-839-3800.