


A roof claim supplement is a formal request for additional insurance money after your insurer’s first estimate misses damage that only shows up once repairs start. The moment you spot hidden damage, gaps in decking, or code items your adjuster overlooked, document it with photos and call a licensed contractor for an itemized estimate. Supplements are routine, not confrontational, and insurers approve them regularly when the paperwork backs up the ask.
TL;DR:
- Most supplements are approved when homeowners provide clear, photo-supported estimates that highlight hidden damage not included in the insurer’s initial quote.
- Submit supplement requests promptly with detailed documentation, including photos, itemized estimates, and receipts, and follow up if the insurer delays or disputes the claim.
- Do not sign a full release until the roof is fully torn off and inspected to avoid waiving future supplement opportunities, especially when hidden damage may still be present.
- The 25% rule guides whether a roof should be replaced or repaired, but its application varies, making contractor input essential before assuming it applies.
- FEMA assistance is available for underinsured homeowners but requires proper documentation of costs insurance does not cover, and claims should be filed quickly and thoroughly.
Table of Contents
- Step-by-step roof claim supplement process
- Documentation checklist to support a supplement
- How contractors and adjusters handle supplements
- Timeline expectations and insurer response windows
- Common pitfalls, the 25% rule, and what not to say to an adjuster
- FEMA and disaster assistance when insurance falls short
- How Crowley Exteriors supports supplement documentation
- A homeowner-first take on the supplement process
- How Crowley Exteriors can help with your claim
- Sources
- FAQ
Step-by-step roof claim supplement process
A supplement starts the moment you or your contractor find damage that the original insurance estimate did not account for. That gap between what the adjuster wrote and what the roof actually needs is the entire basis for the request, and the process that follows is mostly about proving the gap is real.
- Inspect and secure the area. Walk the roof or have your contractor do it, and put a tarp over any exposed sections before more weather gets in.
- Document with time-stamped photos and video. Capture wide shots and close-ups of every affected area, including the date and location, before any repair work begins.
- Get an itemized contractor estimate. A reputable roofer should list hidden damage, code-required upgrades, and material quantities separately from the original scope of work.
- Map contractor line items against the insurer’s estimate. Line up each item your contractor found against what the insurance company already approved, and flag every gap in writing.
- Submit the supplement package. Most contractors transmit this directly to the adjuster or claims desk, attaching photos, the itemized estimate, and a short explanation tied to each new item.
- Follow up and escalate if needed. If the insurer disputes or ignores the submission, request a written response and keep a dated log of every call and email.
The trickiest part is usually step four. Insurers write their first estimate from a distance, often using aerial imagery or a quick walk-around, and it rarely accounts for damage found once shingles come off. A contractor doing a tear-off frequently discovers soft decking, saturated underlayment, or bent flashing that was invisible from the ground. That discovery is what turns a normal claim into a supplement, and it is why the initial claim process and the supplement process are related but distinct: the first sets the baseline, the second corrects it.
Submission methods vary by insurer. Some accept supplements through a contractor portal, others require a direct e-mail to the adjuster of record, and a few still want a mailed packet. Whichever channel you use, keep a copy of everything you send and note the date. If your roof also sustained wind damage, a photo checklist taken in the first 72 hours makes this step far easier because the evidence already exists before repairs start.
Once submitted, most supplements move into a review queue where a company adjuster compares your contractor’s line items against their own pricing software. Some items get approved outright, some get partial approval, and some get denied with a reason. Each denial should come with an explanation you can respond to, and that response is often just more documentation: another photo, a code citation, or a corrected measurement.
Documentation checklist to support a supplement
The strength of a supplement comes almost entirely from documentation. Insurers do not deny supplements because they distrust homeowners; they deny them because the paperwork does not connect the dots between the damage and the dollar amount requested.
- Photos and video: before-repair wide shots, tear-off photos showing decking and underlayment, close-ups of flashing and ventilation issues, and anything discovered mid-project.
- Itemized contractor estimate: material quantities, labor hours, code-upgrade line items, and unit pricing, similar to the 12-line breakdown Crowley Exteriors uses on typical jobs.
- Receipts and invoices: proof of payment for any emergency repairs, plus signed change orders if the contractor’s scope grew mid-project.
- Policy paperwork: your declarations page, claim number, and the names and direct contact information for both the field adjuster and the desk adjuster.
The NAIC’s post-disaster claims guide advises homeowners to keep every receipt tied to emergency repairs, since insurers often reimburse those costs separately from the main structural payment. That guide also notes that insurers frequently pay in stages, covering actual cash value first and recoverable depreciation once the work is finished and documented.
Pro Tip: Keep a single folder, digital or physical, labeled with your claim number, and drop every photo, receipt, and e-mail into it the same day you receive or take it.
Skipping any one of these categories tends to slow things down rather than sink the claim outright. An adjuster who cannot verify a line item will usually just ask for more proof, which restarts the clock on your supplement.
How contractors and adjusters handle supplements
Three parties typically touch a supplement: your contractor, the insurance company’s adjuster, and, in some cases, a public adjuster you hire independently. Knowing what each one actually does keeps the process from feeling like a black box.
- Your contractor prepares the itemized estimate and usually submits the supplement directly, because they are the ones who found the hidden damage during tear-off.
- The company adjuster reviews the submission, may schedule a re-inspection, and accepts, partially approves, or denies each line item with a stated reason.
- A public adjuster, hired and paid by you rather than the insurer, can negotiate on your behalf, but their fee is worth weighing against the size of the supplement you are pursuing.
- An attorney becomes relevant only if the insurer denies a supplement outright and refuses to reconsider after a written appeal.
A contractor’s line-item estimate carries weight because it ties dollars to specific, provable damage rather than a general repair request. When the estimate is well organized, each line should reference a photo, and each photo should reference the specific damage that justifies that line. That audit trail is what lets an adjuster approve items quickly instead of sending the file back for clarification.
Public adjusters make the most sense after an insurer has already made an initial payment and a homeowner suspects the supplement will be substantial or contested. For smaller supplements, most homeowners find that a well-documented contractor submission is enough, since the adjuster’s job is to verify damage, not to argue against a fair estimate. Involving a public adjuster too early can add cost without changing the outcome if the paperwork was already solid.
If you are unsure whether your contractor’s documentation meets this bar, ask directly whether they format estimates with photo references tied to each line. That single question tends to separate contractors experienced with supplements from those who are not.
Timeline expectations and insurer response windows
Most insurers acknowledge a straightforward supplement request within a couple of weeks, though catastrophic weather events routinely stretch that timeline because claims volume spikes faster than adjuster capacity. The Missouri Department of Insurance advises homeowners to report claims quickly and make temporary repairs while keeping every receipt, since delays are common after widespread storm damage.
Watch your policy for proof-of-loss deadlines and any appraisal clause, since missing a stated window can complicate a supplement even when the underlying damage is legitimate. If you have not heard back within a reasonable stretch, a short weekly follow-up call or e-mail, asking specifically for a claim status and the adjuster’s direct line, keeps your file active without becoming a nuisance.
If your file gets closed before repairs are finished, you generally have three options: ask the insurer to reopen the claim, submit the supplement in writing with a formal request for reconsideration, or contact your state’s Department of Insurance if the insurer stops responding. Missouri residents can call the department’s consumer hotline for exactly that kind of stall.
Common pitfalls, the 25% rule, and what not to say to an adjuster
The single costliest mistake homeowners make is signing a full and final release before repairs are complete. Once you sign, you typically waive the right to request more money for that loss, even if a contractor finds additional hidden damage the next day. Keep the claim open until the roof is fully torn off and inspected.
The “25% rule” comes up often in roofing supplements. It refers to a common guideline insurers and contractors reference when deciding whether a roof needs a full replacement instead of a patch repair, generally when damage affects roughly a quarter or more of a roof slope or an entire system component. The rule’s application varies by insurer and by state, so it is worth reviewing with your contractor rather than assuming it applies automatically. Crowley Exteriors breaks down how the repair-versus-replace decision works in more detail.
- Avoid saying “we already settled” if you have not signed a final release, since that phrase can be read as agreement to close the file.
- Avoid calling anything “just cosmetic,” even casually, since that word can be used to deny a legitimate structural or functional line item.
- Ask for a written denial whenever an adjuster refuses a line item, so you have something concrete to respond to or appeal.
- Stick to facts and dates on every call, and avoid speculating about cause or cost out loud.
Pro Tip: If an adjuster tells you something verbally that affects your claim, follow up in writing summarizing what was said and ask them to confirm.
FEMA and disaster assistance when insurance falls short
FEMA can help homeowners whose insurance does not fully cover storm damage, but it will not pay for costs your policy already covers. According to FEMA’s guidance for insured survivors, applicants must disclose all insurance coverage and typically need to submit a settlement letter, a denial letter, or proof that certain costs are not covered before FEMA calculates assistance. FEMA also weighs recoverable depreciation and any insurer payments already received when deciding an award.
Homeowners can submit these documents to FEMA online through their disaster assistance account, by mail, or in person at a Disaster Recovery Center, whichever is fastest for their situation.
How Crowley Exteriors supports supplement documentation
During a free inspection, Crowley Exteriors photographs visible damage and flags areas likely to reveal more once tear-off begins, then documents decking, underlayment, and flashing issues as they are found. That documentation feeds into an itemized estimate formatted the way insurers and mortgage lenders expect: material quantities, labor, and code items broken out line by line, similar to the 12-line estimate example Crowley Exteriors publishes for homeowners.
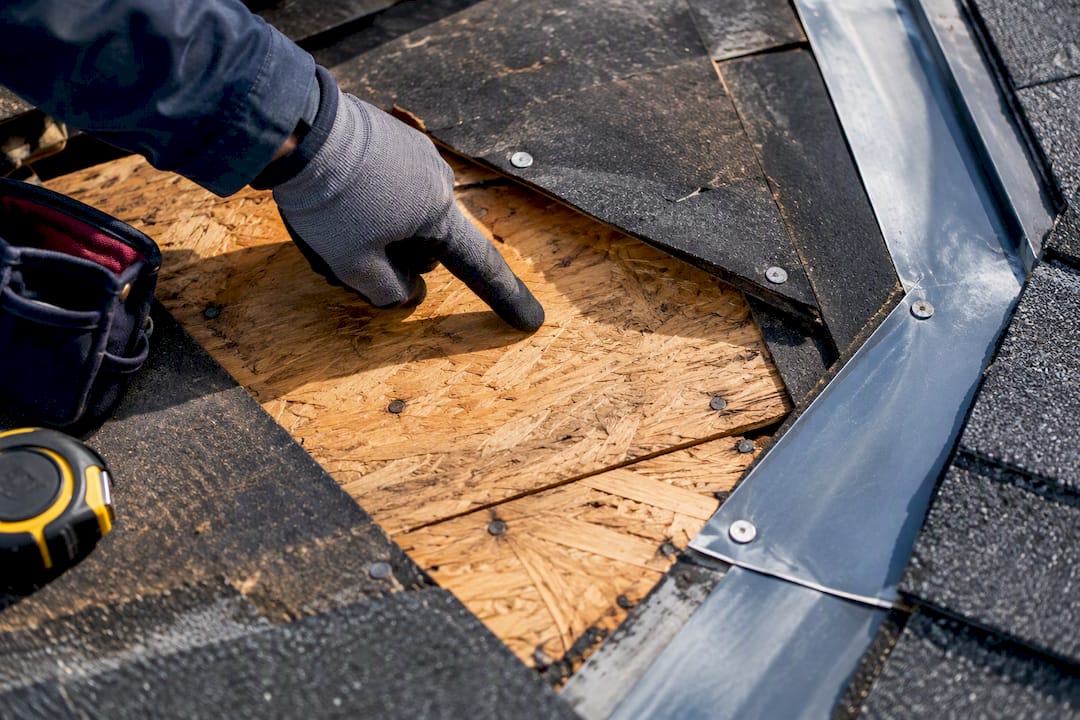
When hiring any contractor to support a supplement, ask how they document tear-off findings, whether they photograph each line item separately, and whether they communicate directly with your adjuster or leave that step to you.
A homeowner-first take on the supplement process
Insurers are not adversaries in most supplement cases, but they respond to evidence, not persistence. The homeowners who recover the most are the ones who document obsessively and refuse to sign away their rights before the roof is fully opened up.
Three things to remember: document everything before, during, and after repairs, get an itemized estimate rather than a rough quote, and never sign a final release until you are certain no more hidden damage is waiting under the shingles.
— Mario
How Crowley Exteriors can help with your claim
Crowley Exteriors offers free inspections and itemized estimates that give homeowners in St. Charles County exactly the kind of documentation insurers expect for a supplement, without any upfront cost or obligation to hire. Their team handles storm and hail damage repair and insurance claim assistance alongside the actual roofing, siding, and gutter work, so the same crew that documents the damage is the one that fixes it.
During an inspection, expect a walk-around of the roof, clear photos of anything questionable, and a written estimate broken into line items rather than a single lump sum. If your roof needs full replacement rather than a patch, Crowley Exteriors also handles roof replacement projects from start to finish.
- Free, no-obligation roof inspections with photo documentation.
- Itemized estimates formatted for insurance and lender review.
- Direct support preparing and submitting supplement paperwork.
Reach out through Crowley Exteriors’ contact page to schedule an inspection and get a written estimate started.
Sources
For deeper guidance, consult FEMA’s insurance documentation requirements, the NAIC’s post-disaster claims guide, and Missouri’s Department of Insurance consumer hotline for disputes.
- Help survivors with insurance | FEMA
- Post-Disaster Claims Guide | NAIC
- Resources for Severe Weather Victims | Missouri Department of Insurance
FAQ
How do I supplement a roof insurance claim?
Document the newly found damage with photos, get an itemized estimate from your contractor listing each hidden item, and submit that estimate to your insurer’s adjuster with a written explanation of the gap between it and the original approved scope.
How long does a roof claim supplement take to get approved?
Simple supplements are often acknowledged within a couple of weeks, but the Missouri Department of Insurance notes that widespread storm events can slow this considerably due to claims volume. If your file stalls, follow up weekly and escalate to the state hotline if the insurer stops responding.
What is the 25% rule in roofing insurance claims?
The 25% rule is a common guideline some insurers and contractors use to decide whether a roof needs full replacement rather than a partial repair, typically when a significant portion of a slope or system is damaged. Its exact application depends on your insurer and policy, so confirm the details with your contractor’s assessment before assuming it applies.
What should I avoid saying to a roof insurance adjuster?
Avoid phrases like “we already settled” or “it’s just cosmetic,” since both can be interpreted as agreeing to close out items that may still need coverage. Stick to factual descriptions of the damage and ask for any denial in writing so you can respond to specifics rather than a verbal impression.
Can FEMA help if my insurance does not cover all my roof damage?
FEMA can provide assistance to underinsured homeowners, but it will not pay for costs your policy already covers, according to FEMA’s guidance. You will typically need to submit your insurance settlement or denial letter along with proof of the uncovered costs when applying.
Recommended
- How To File A Roof Insurance Claim: A Homeowner’s Guide
- What Should Be On Your Roof Estimate Checklist?
- Roof Warranty Explained: What Coverage You Actually Get
- Three Checks Homeowners Can Do In 10 Minutes To Choose A Roofer
This article was prepared with AI assistance for general information. For recommendations specific to your property, contact Crowley Exteriors. Call or text us at 314-839-3800.